The Wii is a console that at this point could be considered as classic… yes, classic. And that only 10 years have passed since his “death” or at least the death of his generation. But it is the graphic aspect of their games that gives us that retro feeling, even more so when compared to the current generation. However, here in Don as we are quite fans of retro, so if you own one of these consoles and do not know what use to give it, take note of this article. Well, we’re going to show you how to spice up your old console by downloading Wii games and playing them on a USB stick or SD card.

Surely you will have noticed that in the rear of the console there are two USB ports, since they give us the possibility of installing certain extra “functions” to our console. And all thanks to the ingenuity of many Internet users, who even after the death of the console, found ways to keep it alive.
However, a video game console is for games, right? Therefore, it is best to know how to download Wii games and be able to play them on the console. We will achieve this without the need to spend a penny, so your pocket can be left alone.
Requirements for uploading Wii games to USB memory.
The process itself is extremely simple, in fact in a matter of 15 minutes maximum you will have your USB ready to be able to load games and start playing on the Wii. Although yes, you will need the following:
- A USB memory, minimum of 4GB although the use of 32GB is recommended.
- That your Nintendo Wii has the USB Loader installed.
- The Wii console must be chipped or hacked.
- Download the program called Wii Backup Manager (click here).
- Download the ISO of the Wii game you want to load onto the USB.
If you already have each of the requirements, you can move on to the next step, otherwise, you will have to wait until you have everything.
Step by step.
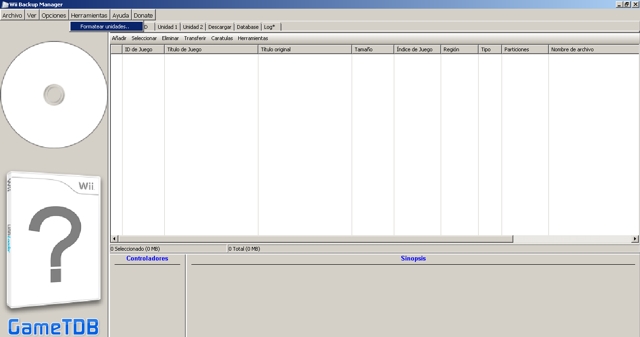
- First we will open the software called Wii backup manager.
- We will insert the USB memory into the computer.
- Once the program interface is on the screen, we must locate the option that says “Tools” and then press them on format drive. It is there where we will select our USB and choose WBFS as the file system.
- After formatting the USB, it will seem as if it is not connected to the computer, but don’t worry, this is normal. Then we will only focus on loading the ISO of the Wii games to the program, this is done by pressing “add”.
- In that same menu, we will locate the option that says “unit 1”, and then select our USB in the “inactive” tab.
- Up to this point we have loaded the games and assigned the USB to drive one, so all that remains is to transfer the games. This is done from the same program, you just have to click on “transfer” and the process will start. This will be delayed according to the weight of the game itself. But usually within minutes the transfer is complete.
If you have done all the process well, you can unplug your USB from PC and plug it into your Wii console. If you load the game from the USB loader inside the console, you can start playing and spend a few hours of leisure playing the Wii games you want.

